A Guide to Hard Surface Modeling in VR with Shapelab Max
with Ben Fauber (Prism Prints)
If you are planning to create 3D models of cars, drones, androids, or weapons, you will likely need to master hard surface modeling. While many associate VR with fluid, organic sculpting, the release of Shapelab Max has turned the virtual workspace into a powerhouse for precision-based design.
In this guide, Shapelab ambassador and talented artist Ben Fauber of Prism Prints takes you through the essential tools and workflows for achieving hard surface models with the tools in Shapelab Max.
What is Hard Surface Modeling?
Before we dive into the “how-to,” let’s define the craft. Hard surface modeling is a technique used to create 3D models of inanimate objects with firm, static surfaces. Unlike organic modeling—which focuses on the smooth curves of living creatures like animals or humans—hard surface modeling is the go-to choice for:
- Vehicles and Engines
- Weapons and Props
- Architecture and Environments
- Product Prototypes
While a tree is technically “organic,” its rigid bark and static structure often mean it falls under hard surface techniques. Whether you are using box modeling (starting with a primitive cube) or digital sculpting (using virtual clay), the goal is clean lines and mechanical accuracy.
Mastering the Hard Surface Toolkit in Shapelab Max
I wanted to share some of the tips and tricks I’ve learned for hard surface modeling in VR using Shapelab Max 2026. In this article, I’ll give an overview of the tools and menus I like to use from start to finish when tackling a hard surface project. There is also a tutorial linked to my YouTube channel for a corresponding video. Below is a list of the topics I’ll be covering.
- Gizmo
- Clone Object
- Selecting Multiple Objects
- Boolean Object
- Snapping Points
- Create Tab
- Symmetry Tab
- Voxel Remeshing
The Gizmo Tool
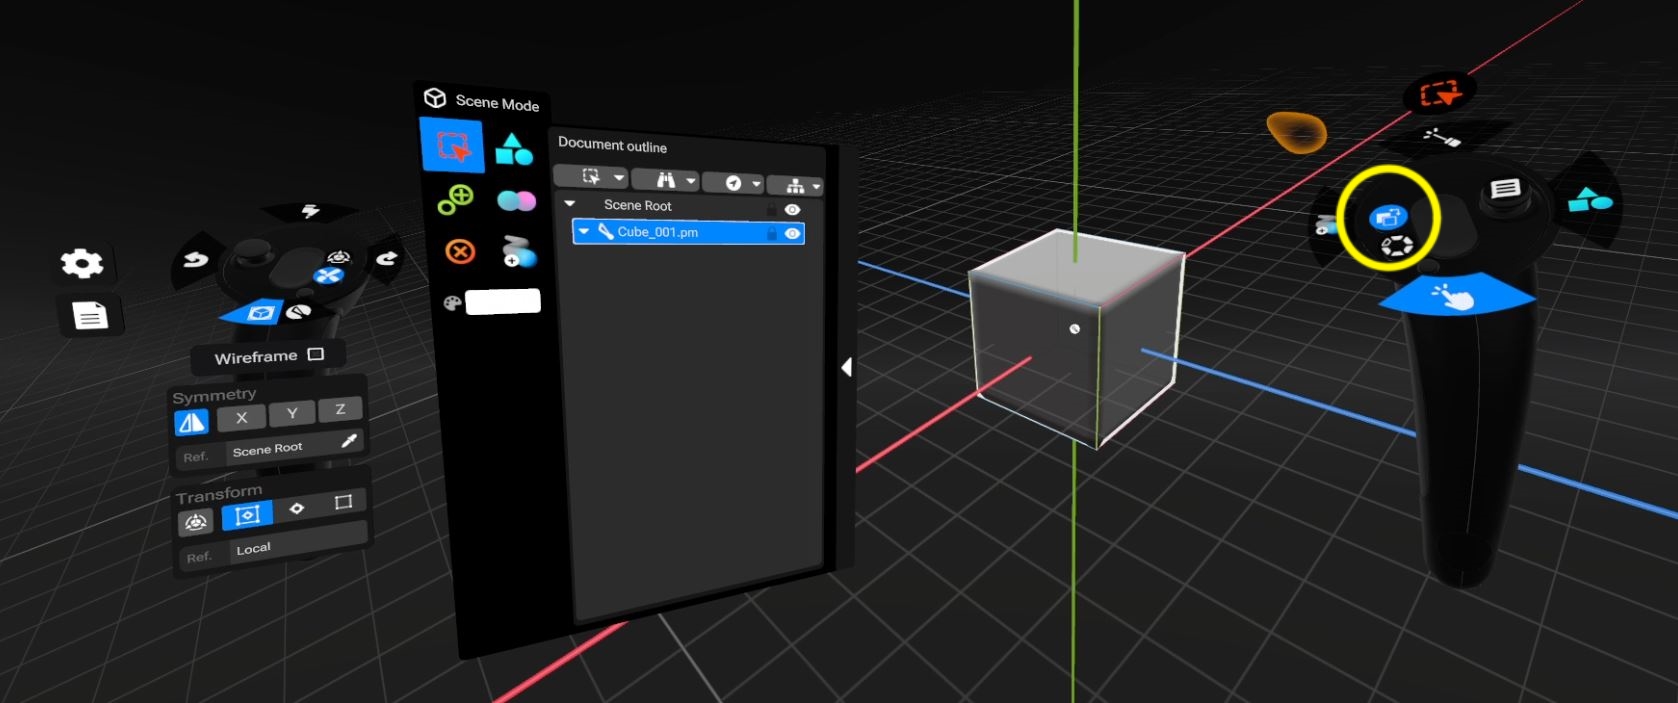
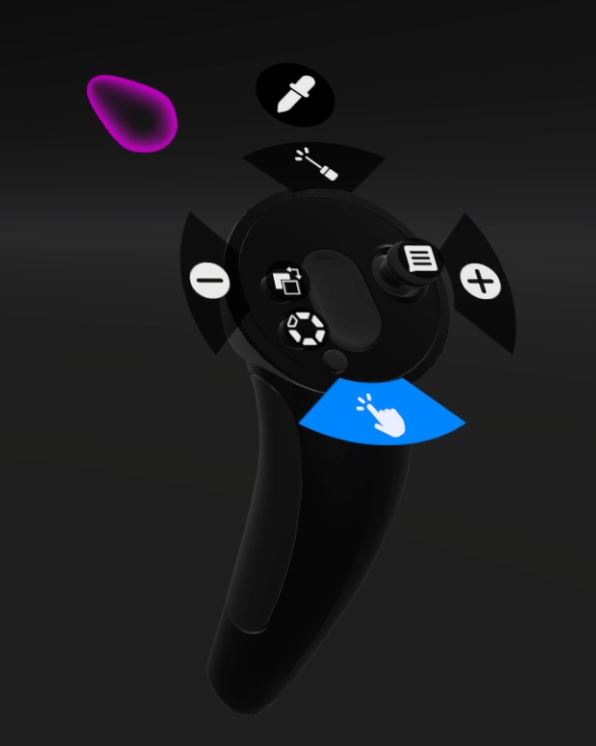
The first tool to become familiar with is the Gizmo. It allows you to move, rotate, and scale geometry along the X, Y, and Z axes, and can be toggled on or off with the press of a button. I use the Valve Index, so it’s the Left B button for me. The Gizmo also gives you the most control when modeling out your project, which is especially helpful when working on something with a hard surface. This tool gets used almost the entire time, so I want to go over what each aspect does.
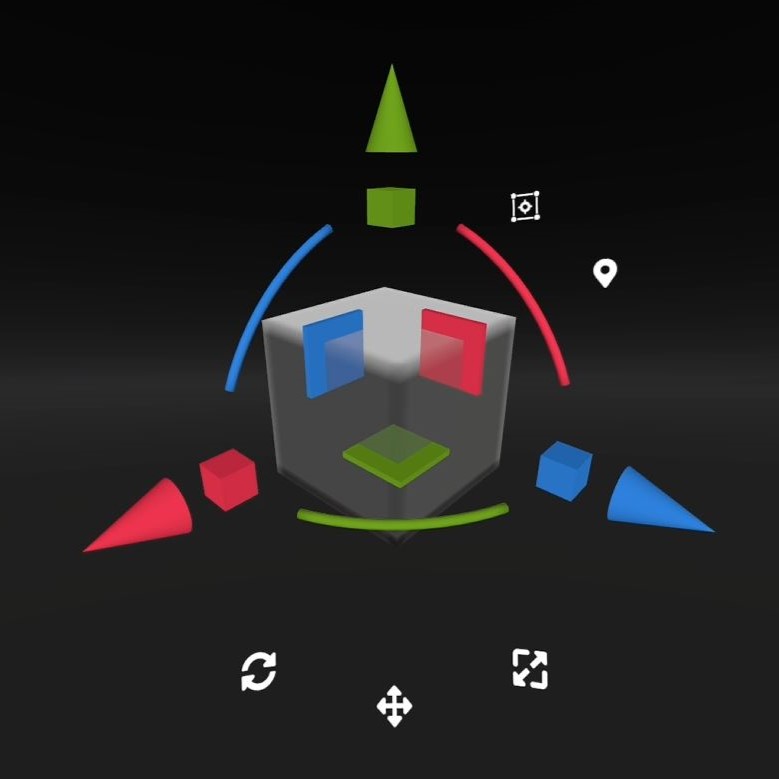
Movement along a specific axis is controlled by the cones.
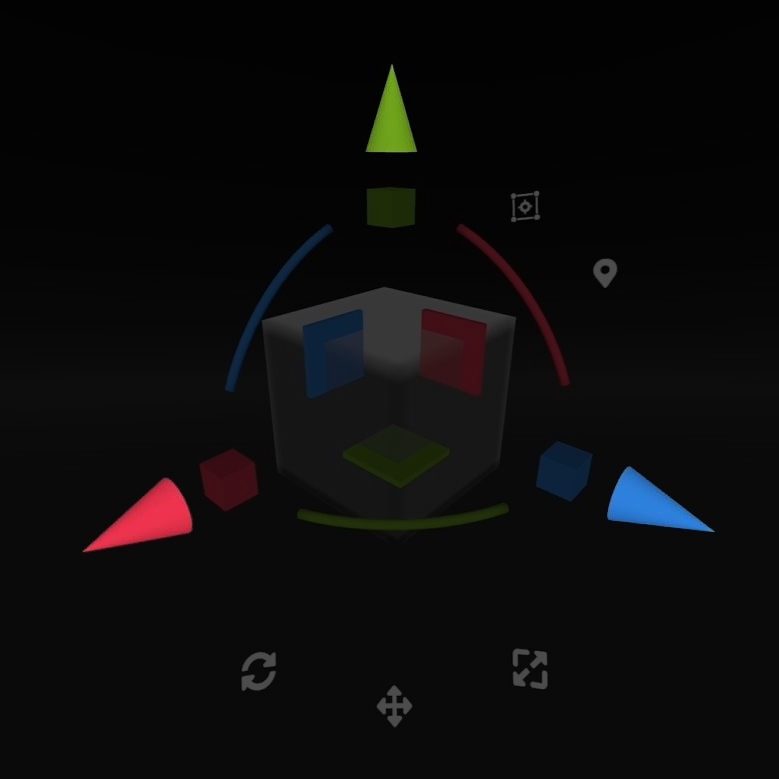
Rotation along a specific axis is controlled by the arches.
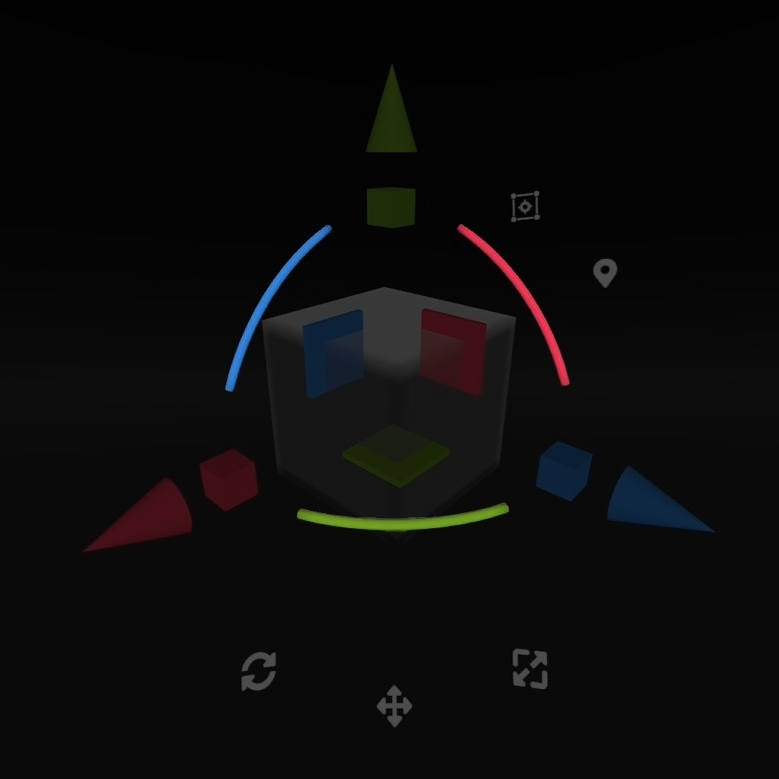
Planes lock you to a specific axis while moving freely on the other two.
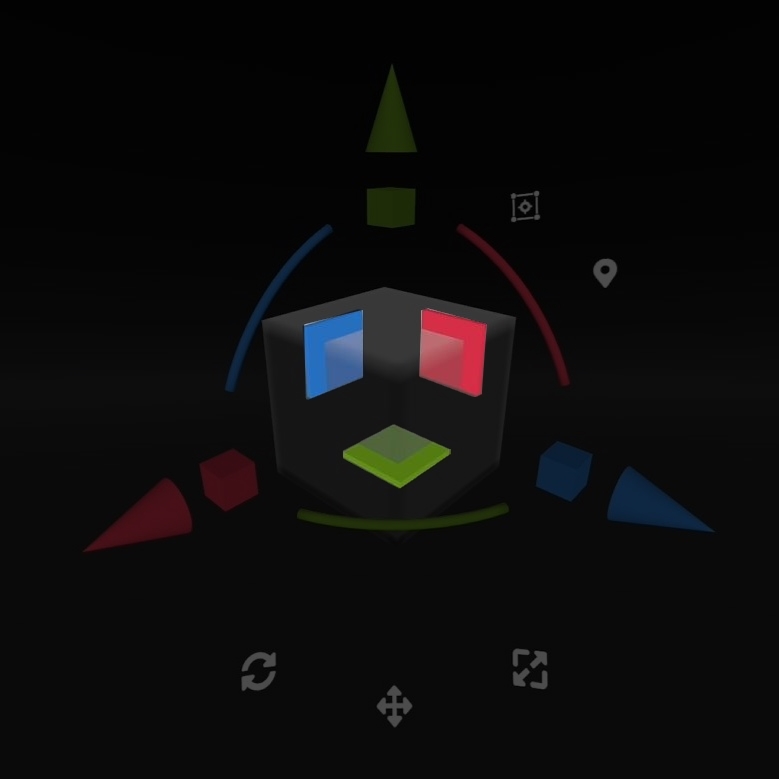
You can increase or decrease the scale on individual axes using the cubes.
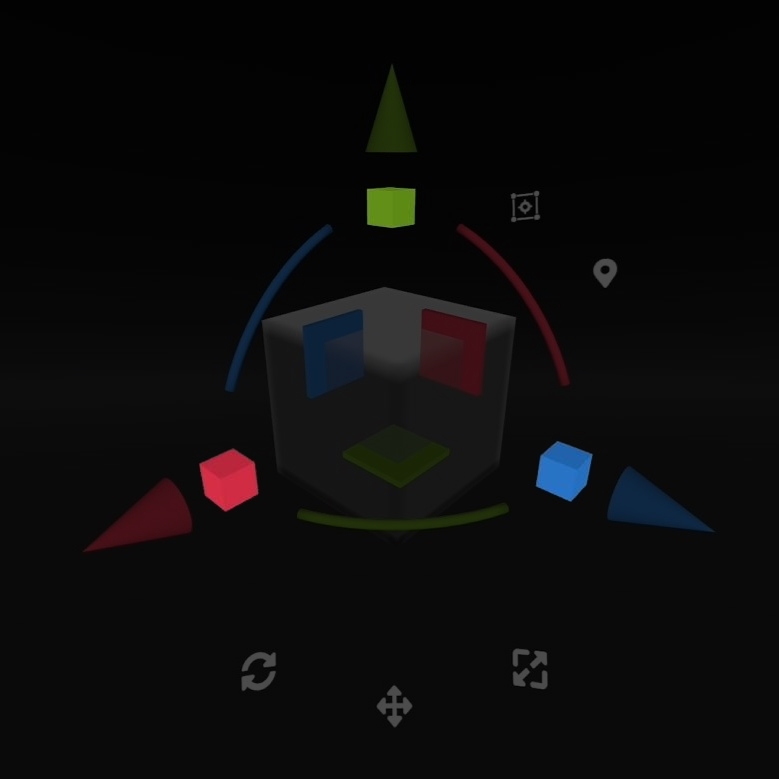
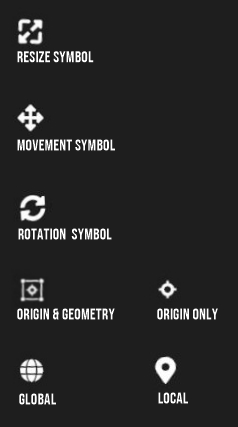
The resize symbol at the bottom right is overall scaling.
The four-way arrow at the bottom center allows you to move along all axes without rotation.
The rotation symbol at the bottom left allows you to rotate objects by rotating your controller.
At the top, you can toggle between Origin & Geometry or Origin Only.
Just below that, you can toggle between Global and Local grids. Switching between the two helps to get the correct angles and alignment when building up your model.
Clone Object
Another very useful tool is Clone Object. Used in tandem with the Gizmo, you can use Clone Object to build up some interesting shapes pretty quick. I think this is a great way to sketch out ideas, as well as save time throughout the sculpting process.
Selecting Clone Object will turn your 3D cursor green. When you move over objects in the scene, they will be highlighted green, as well.


Selecting Multiple Objects
When you want to select multiple objects, make sure you have the Select Tool selected, then hold down the trigger until the 3D cursor begins to flash blue and white. Then, select the other objects you want while keeping the trigger held down.
If you accidentally select the wrong object, you have the option to deselect and refine what you want. On the Valve Index, the right B button will invert to Deselect, making the 3D cursor red.
This is great for when you need to move or copy multiple objects at once, saving you time, and often leading to cleaner results.
Boolean Object
The next useful tool here is Boolean Object. With this operation, you can union two objects together, subtract one from another, intersect, or join them. Object A is represented with blue, and Object B is represented with pink.
I like to make models for 3D printing, so when I want to make my model all one piece ready for exporting, I choose to Union all the objects together. This keeps the internal geometry clean. Using the Subtract Boolean function is sometimes a better option for cutting material away from a hard surface project, as it leads to cleaner, more defined lines. Also, if the objects you are applying the boolean operation to have more polygons, the end result will have a sharper finish. I like to utilize the Voxel Remesh function here.

Voxel Remesh
In the Context Menu, under the Remesh Tab, you have the Voxel remesh settings. I like to play with these settings to give myself more polygons for adding details. Setting the resolution higher will give you more polygons when you hit apply, but you can over-do it quickly. It’s a balancing game based on fidelity versus what your computer can handle. Also, since I focus more on 3D printing, the details are so tiny on the finished print, I can easily lessen the polygons in certain areas without sacrificing much at all. There is also a Quad Remesh function if you need the polygons on your model to have four sides. This isn’t necessary when 3D printing.
Snapping Points
Pulling up the Context Menu, select the Transform Tab to access snapping points. Being able to control distance and angle throughout your sculpt will result in a more “machine-made” finish. I utilize this menu throughout the entire process when working on a hard surface project.
Selecting Grid Snap will lock your movements to a specific distance.

Angle Snap will lock your rotation to a specific degree.

Lastly, Snapping Ratio locks scaling to a specific percentage.

Create Tab
Becoming familiar with the settings in the Create Tab is also very useful. I prefer to start with the cube. A preview cube hovers at the top of the menu to let you see how any changes are affecting the object before placing it in the scene.
You can control the ratio along specific axes. Each setting also has a reset button if you’d like to start fresh. Next, under Shape Modifiers, you can add a hole to the geometry, taper it, and control the polygon density.
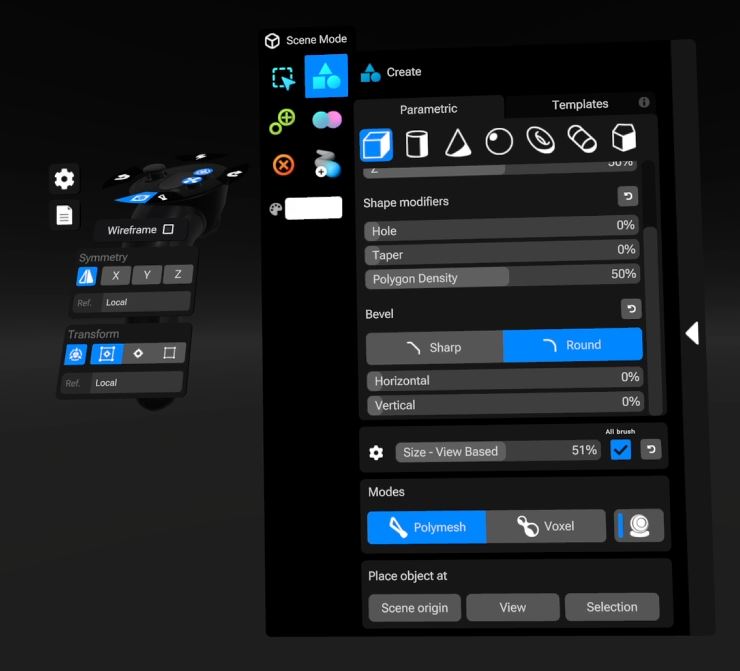
Scrolling down, you have some Bevel options where you can control the percentage being beveled both horizontally and vertically. You can also choose between a sharp or round bevel.
At the bottom left of this menu is a section called Place object at, and you want to select Scene origin. This will place the object so that it’s lined up nicely with the X, Y and Z axes, allowing optimal use of the Gizmo, snapping points, and symmetry options.
Symmetry Tab
The Symmetry Tab in the Context Menu is quite handy for hard surface projects, as well. You can mirror geometry over the X, Y and Z axes with the option to Mirror & Weld into one object, or Clone & Mirror as separate objects.

Up top, you can choose the reference you want to act as the mirror. When picking reference from the scene using the eyedropper tool, your pointer will become pink, allowing you to select the object to become the mirror.
Now, just select which axis, or axes, you want to mirror across, and hit apply.
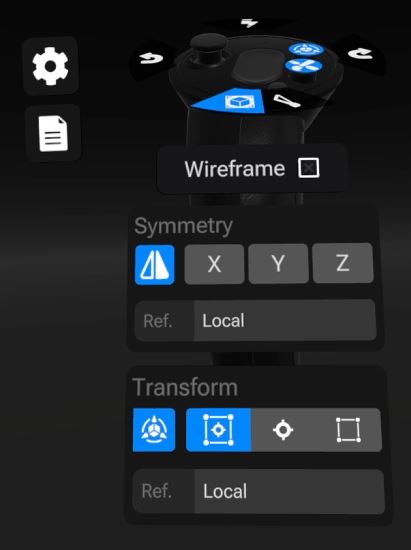
You also have symmetry options just below your wireframe toggle. This allows you to work symmetrically in both Scene Mode and Poly Mode. It kind of depends on what you feel comfortable using, and what works best for the project.
Summary
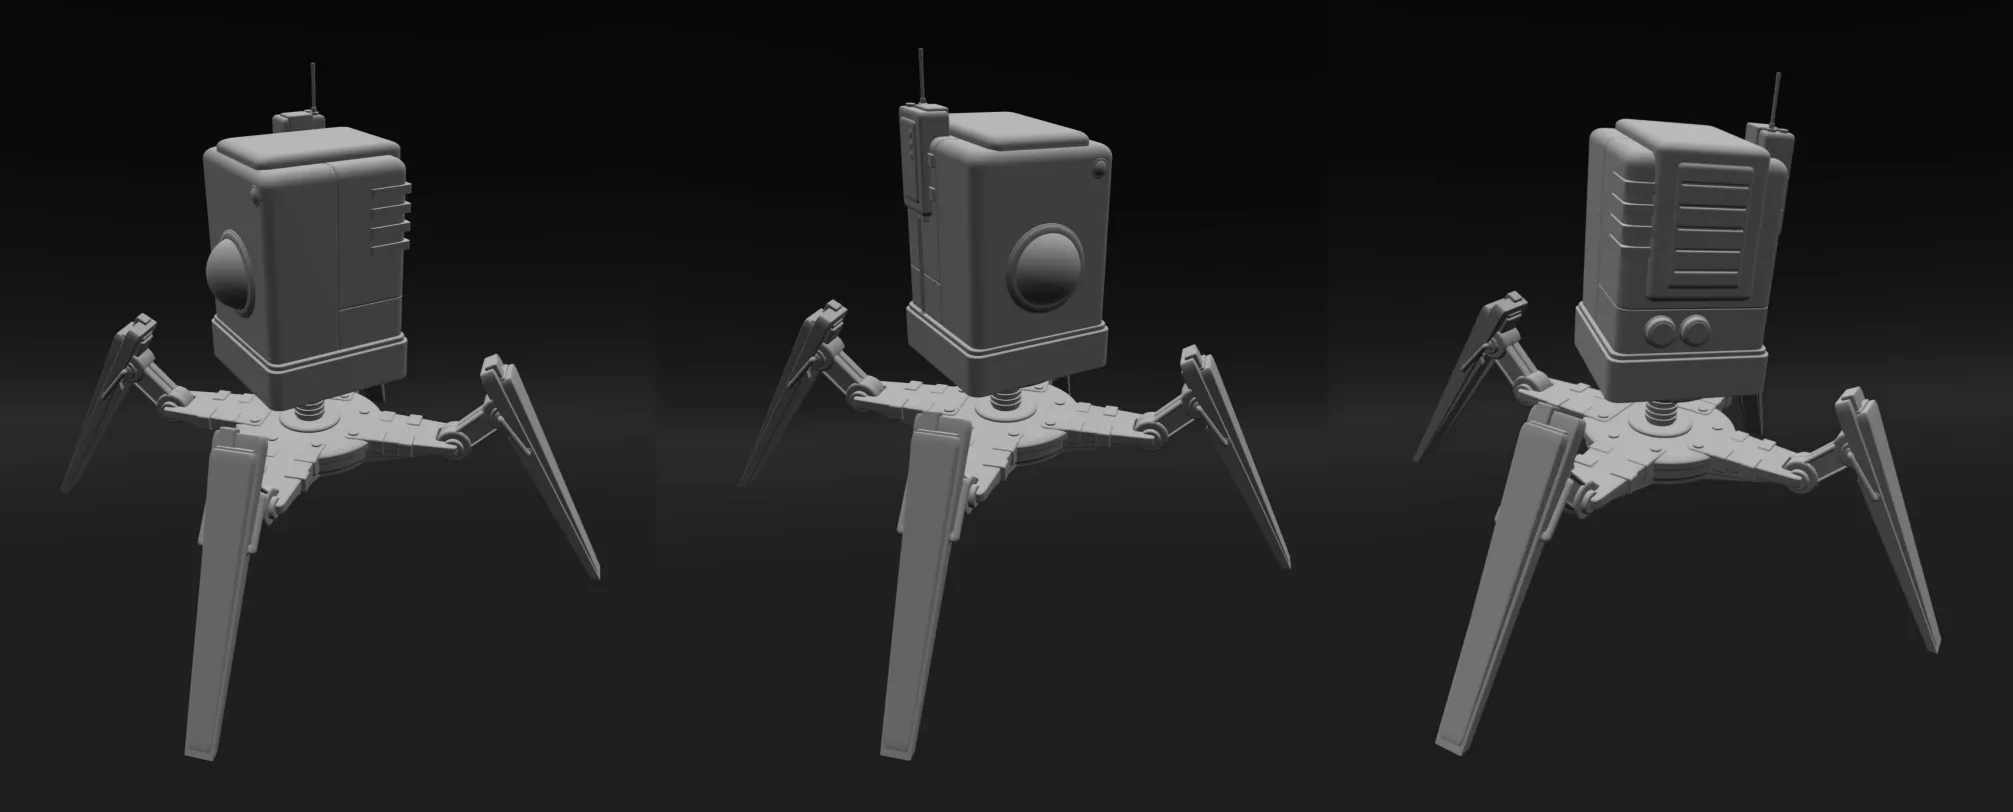
Whether you are sculpting a rocket ship, a massive castle, or a sci-fi robot, these tools will help you bridge the gap between a rough concept and a reality ready for game art or 3D printing. If you’d like to see these menus in practice, check out my robot sculpting tutorial from the Prism Prints YouTube page below.
About the Artist
Ben’s guide provides a clear and practical roadmap for hard surface modeling using Shapelab Max. His personal insights are invaluable for artists and hobbyists alike.
To see more of Ben’s work, subscribe to Prism Prints on Youtube: https://www.youtube.com/@PrismPrints1
Want to give Shapelab Max a try? Use Ben’s code SLPRISM at checkout for 35% off your purchase!