From 3D Model to Miniature: A Complete 3D Printing Workflow
Ever wondered how a digital sculpture becomes a physical object you can hold in your hands? In this article, Ben Fauber, Shapelab Ambassador and creator of Youtube channel Prism Prints, shares his complete end-to-end workflow for transforming digital creations made in Shapelab into stunning 3D printed models. Ben walks you through every step of the journey, from the initial export and file optimization to the final washing, curing, and preparation for painting. This guide is packed with practical tips and personal insights for anyone interested in bridging the gap between virtual art and the tangible world of 3D printing.
3D printed miniature by Prism Prints
Hardware and Software
Before we dive into the nitty-gritty of the workflow, let’s talk about the essential tools that make it all possible. The Prism Prints setup for this process is as follows:
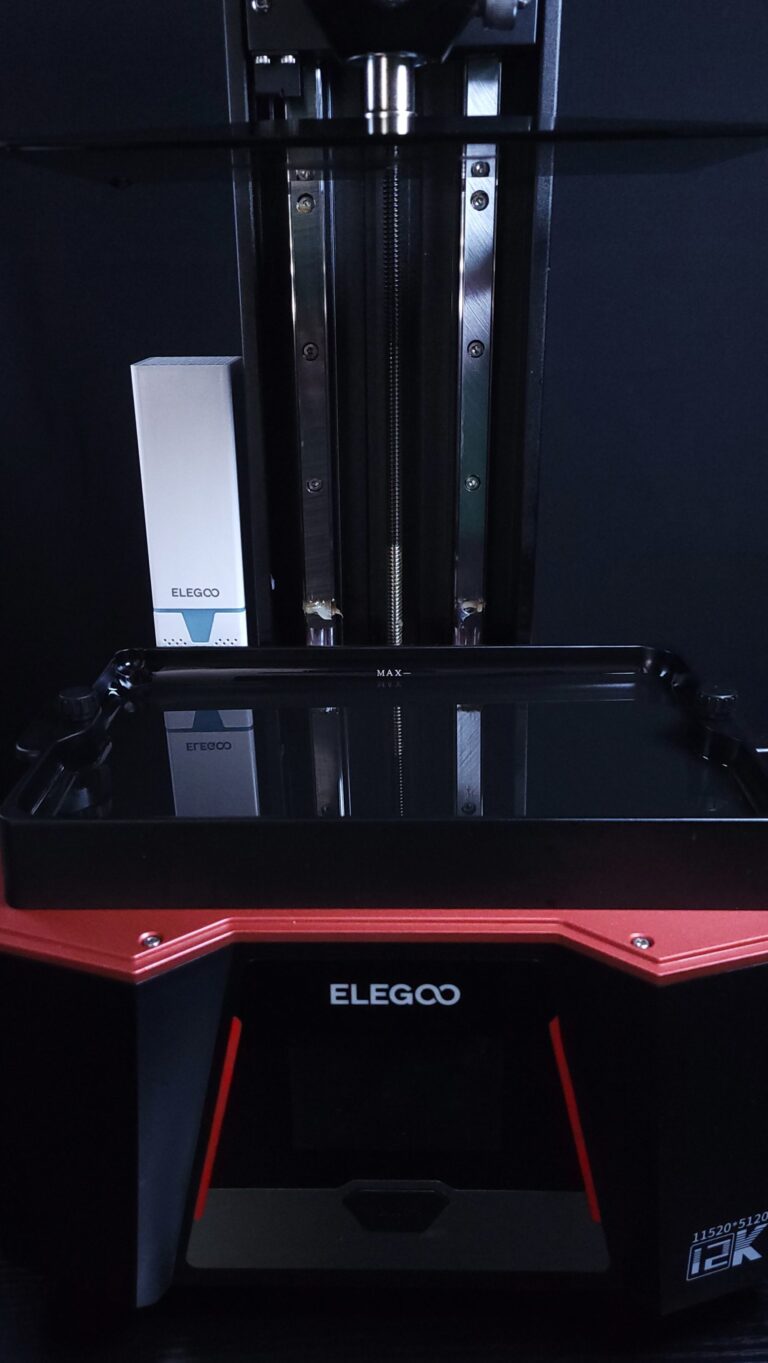
3D Printer: ELEGOO Saturn 3
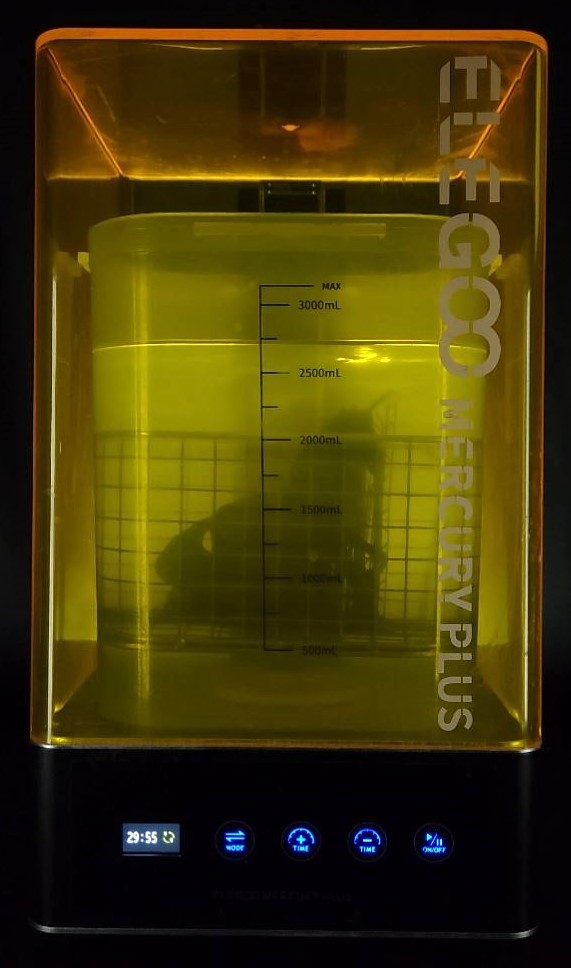
Wash/Cure Station: ELEGOO Mercury Plus V1.0 (ELEGOO)
The entire process, from a digital idea to a physical model, can be broken down into a clear, step-by-step pipeline:
Finish the Sculpt: The journey begins with the digital sculpture itself, meticulously crafted in Shapelab.
Export the STL: Once the sculpt is complete, the file is exported in the .STL format, which is a standard file format for 3D printing.
Slicing Program: The .STL file is then imported into his slicing program, CHITUBOX Basic. This is where the file is prepared for printing.
Send the File to the Printer: The “sliced” file is transferred to the ELEGOO Saturn 3, ready to be brought to life.
Wash / Remove Supports: After the print is finished, it’s time to clean it. The model goes into the ELEGOO Mercury Plus V1.0 for a thorough wash, and support structures are carefully removed.
Cure: The final step is to cure the model using the same station, making it solid and ready for painting.
1. Finish Sculpt
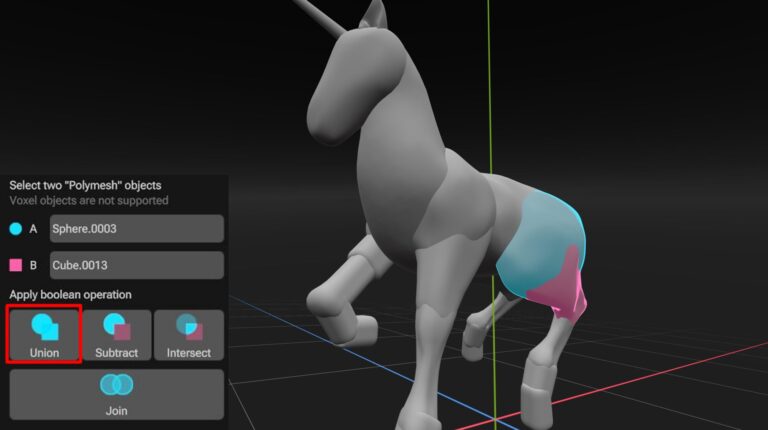
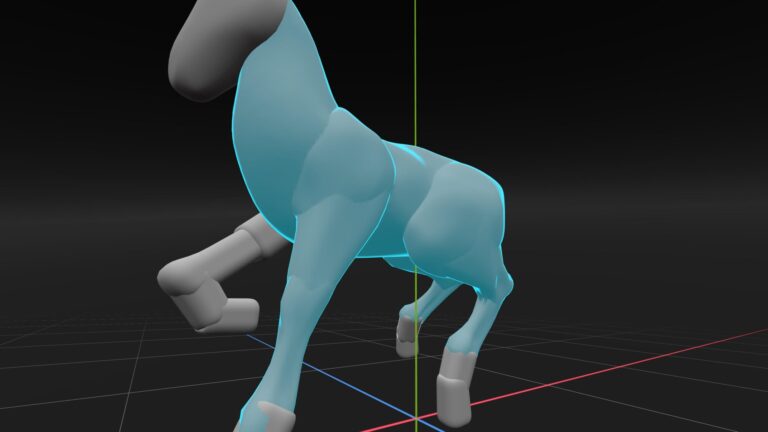
I first make sure the model is all in one piece. I prefer to use the Boolean function in Scene Mode to Union everything together. This prevents any strange internal geometry that could cause problems during the printing process.
Using 'Union' in Shapelab
Using 'Union' in Shapelab
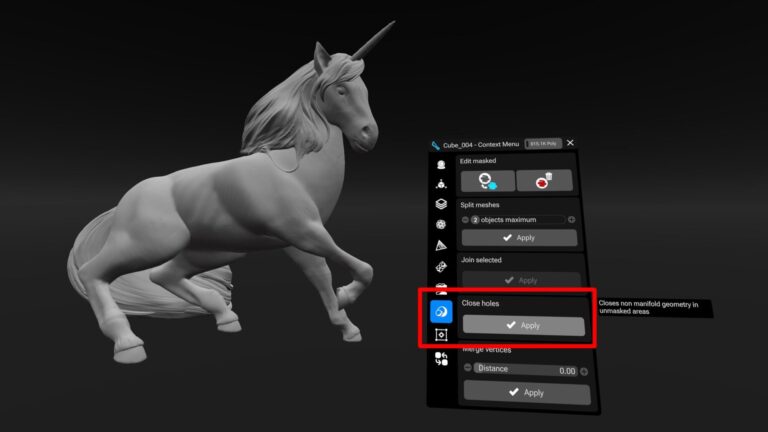
I also make sure to close any holes. This isn’t often an issue for me, but I feel it’s just good practice.
'Close Holes' in Shapelab
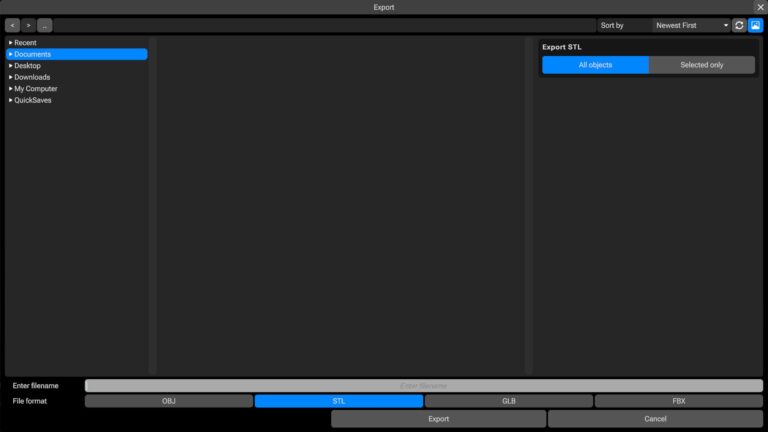
2. Exporting
I choose to export my files as STLs, as they are a reliable format for 3D printing and can be easily shared online. There are other export options available as well.
3. Slicing Program
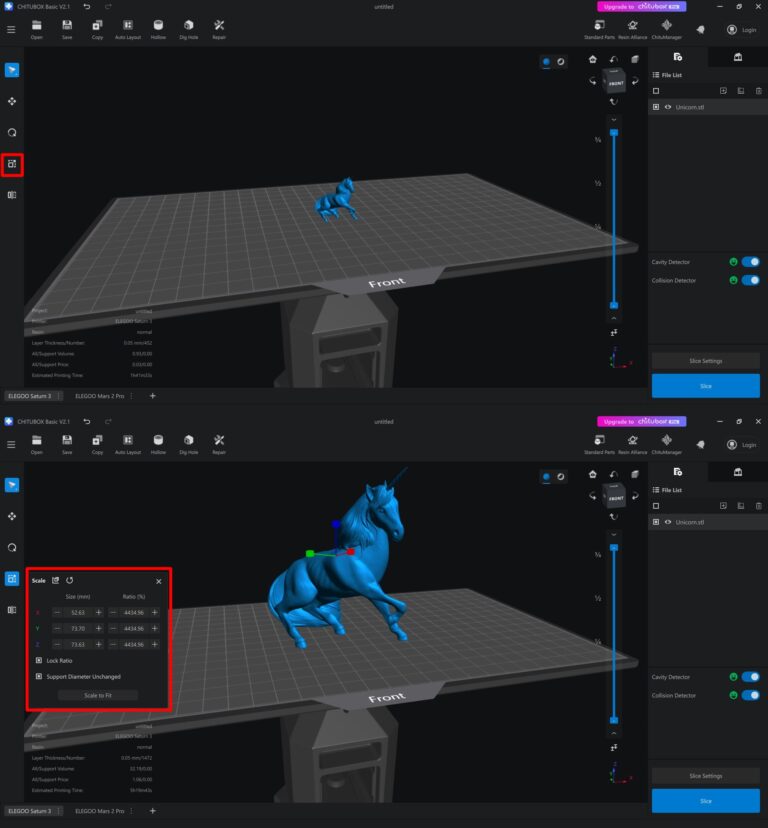
After the STL is exported, I open it in a slicing program to prepare it for printing. While there are many options, my preferred software is CHITUBOX Basic. The steps I’m describing here are specific to CHITUBOX, but they can provide a baseline for other programs. I start by scaling the model to the desired dimensions.
Screenshots in Chitubox Basic
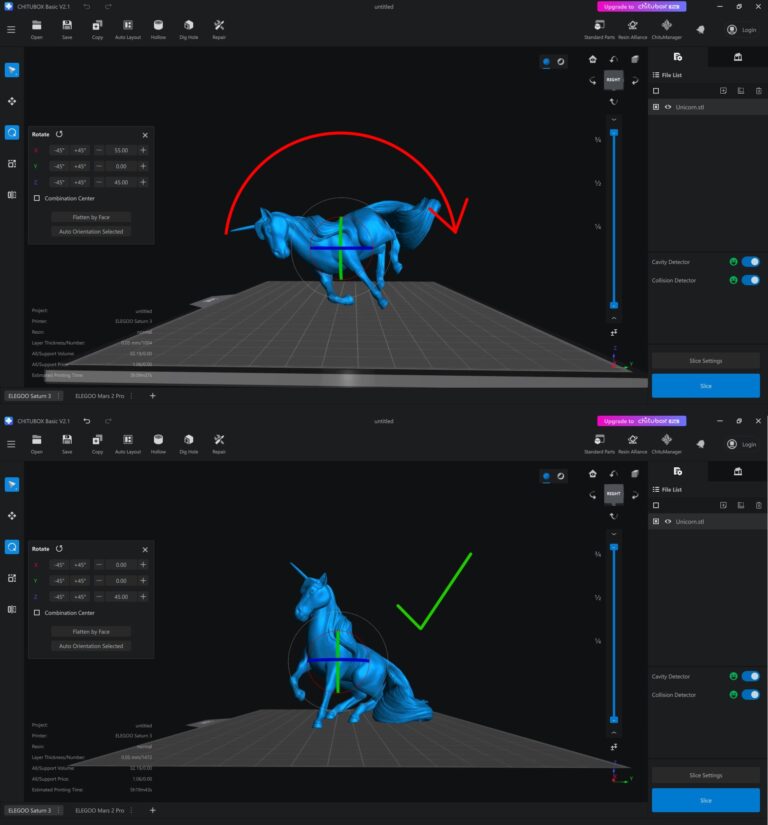
Once it is the right size, I go to the Support tab at the top right of the program, and rotate the model to see where supports are needed. These areas will be colored red. Since supports can leave marks, you’ll want to avoid putting them on the main parts of the model like faces or other focal points. If you notice some main parts of the model are in the red, return to the previous tab, and rotate the model to a better orientation.
If you notice some main parts of the model are in the red, return to the previous tab, and rotate the model to a better orientation.
Fixing rotation in Chitubox Basic
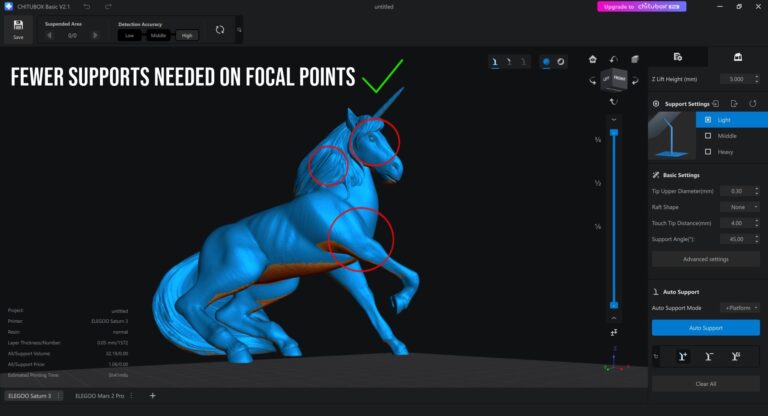
Now fewer supports are needed.
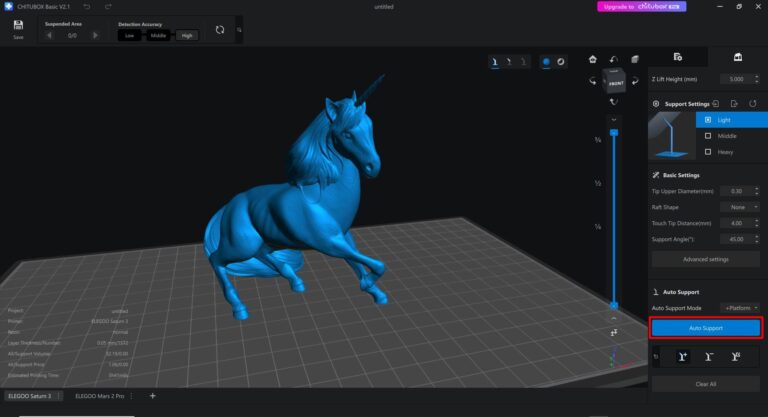
I begin by using the ‘Auto Support’ button, but I always add more supports manually to ensure the print’s success. It’s worth adding the extra supports to know your print will be successful.
Auto Support in Chitubox Basic
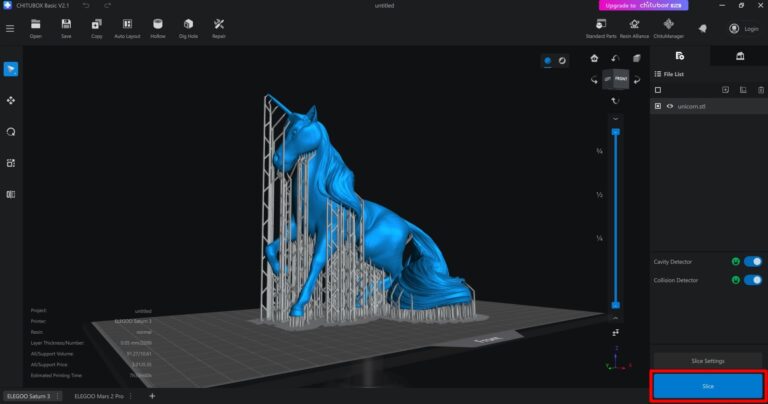
Once I am satisfied, I click the ‘Slice’ button.
Slice in Chitubox Basic
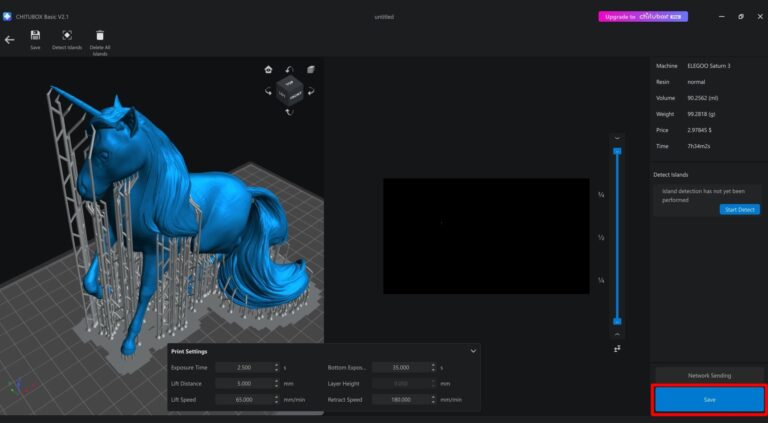
I then click the ‘Save’ button at the bottom right of the window, which creates the file (.ctb) that will be used in the printer.
Save in Chitubox Basic
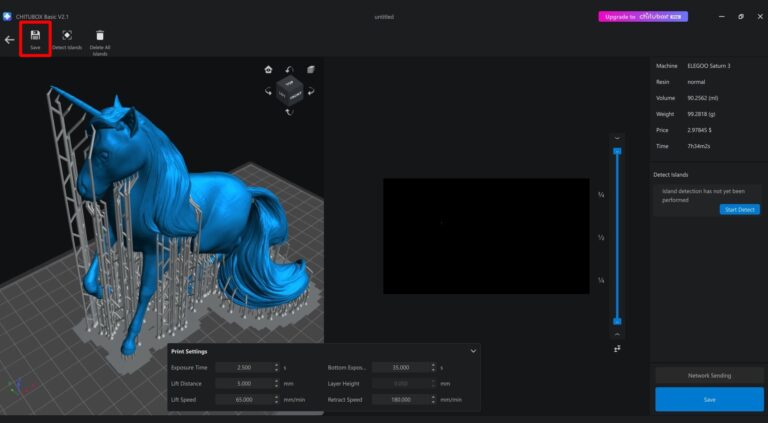
*Clicking Save at the top left of the window will just save the settings and supports, so you can pull it back up on the computer to edit later. (FileName.chitubox)
Save for Editing in Chitubox Basic
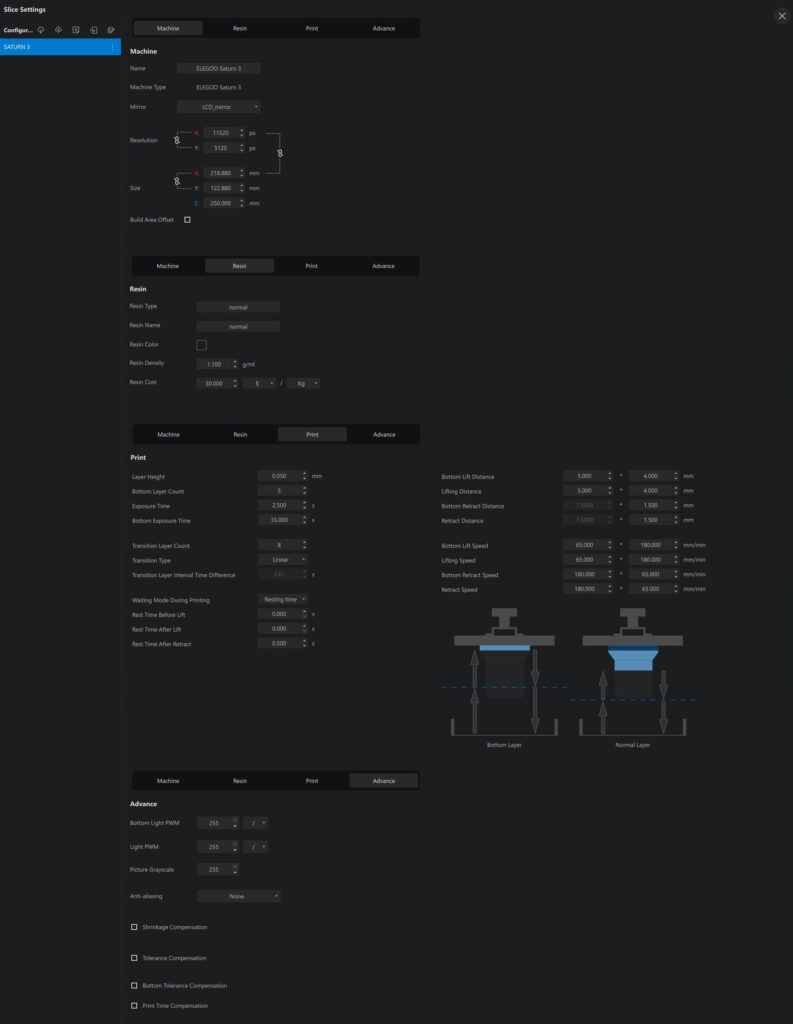
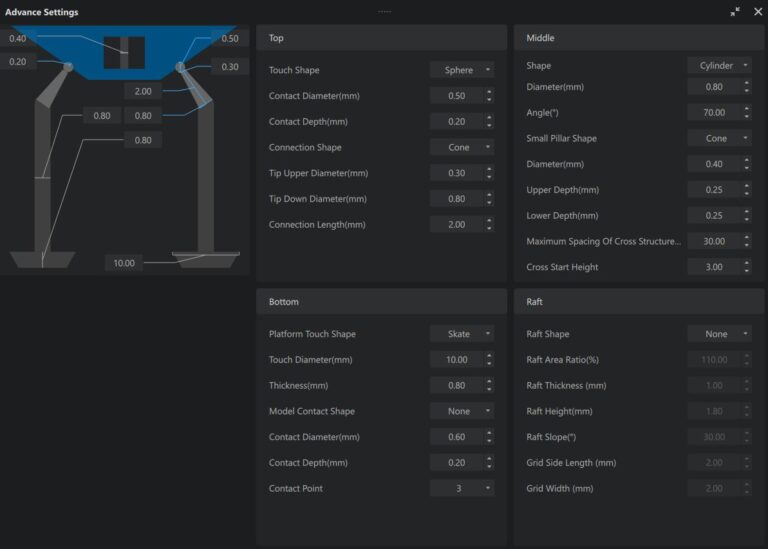
Since there are so many different printers and slicing programs, this part will be a bit of trial and error to really dial in your settings. Here are some screenshots of the settings I use in CHITUBOX Basic.
Slice Settings in Chitubox Basic
Support Settings in Chitubox Basic
I also suggest that you check the resin packaging for specific setting requirements, such as bottom layer count and exposure time. I hope that this information can serve as a good starting point for anyone new to the hobby!
4. File to Printer
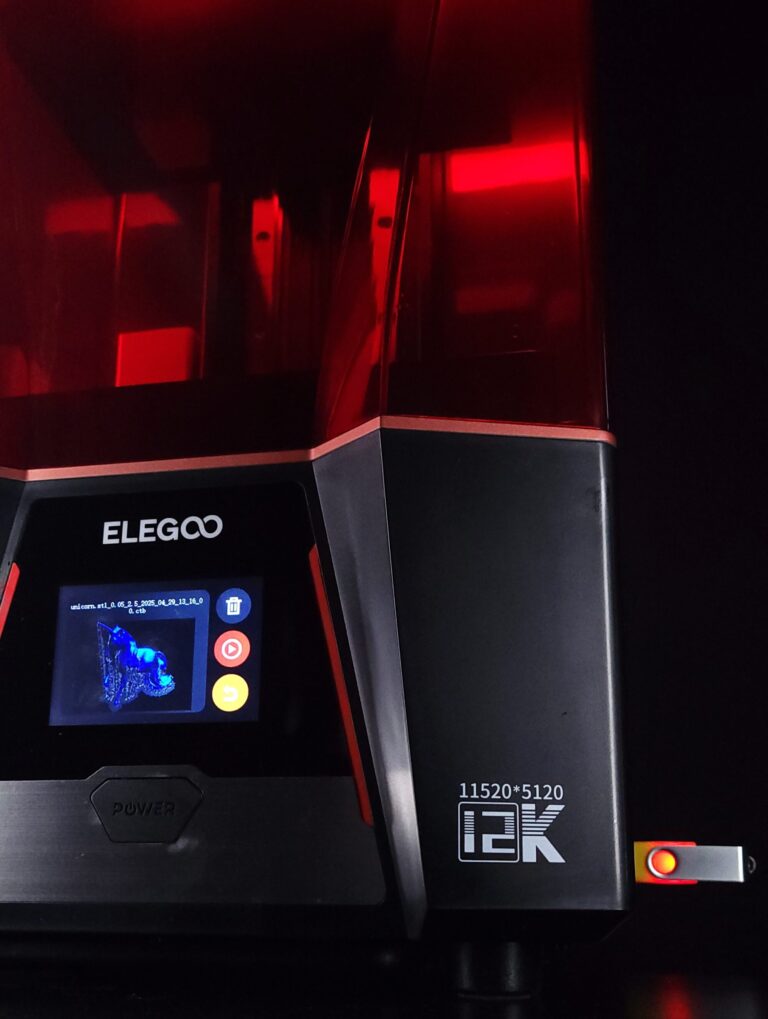
With the file ready, it’s time to print! I transfer the file to the ELEGOO Saturn 3 via a flash drive. After filling the vat with resin, I select the file and start the printing process, which usually takes hours, so patience is key.
Filling Vat with Resin
5. Wash / Remove Supports
Once the print is finished, I move on to washing the model and removing the supports. I use an isopropyl alcohol bath in my ELEGOO Mercury Plus to clean off any uncured resin.
Personally, I choose to remove the supports after I finish washing the model and letting it dry. It cuts down on the risk of splattering resin, but this is just a preference thing. Also, be super careful throughout this process. It can be quite delicate, and uncured resin is very fragile.
However you choose to go about this, always wear gloves and appropriate PPE. At this point, the model is still uncured, thus it is unsafe to touch. Safety first!
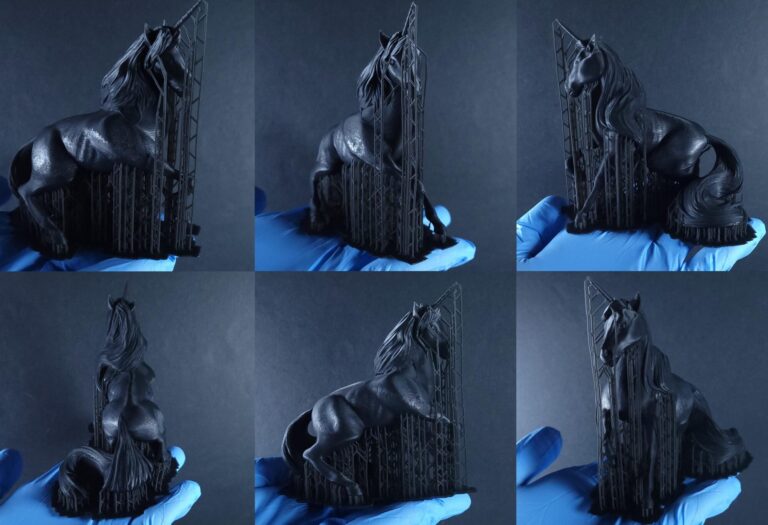
Unicorn printed with supports by Prism Prints
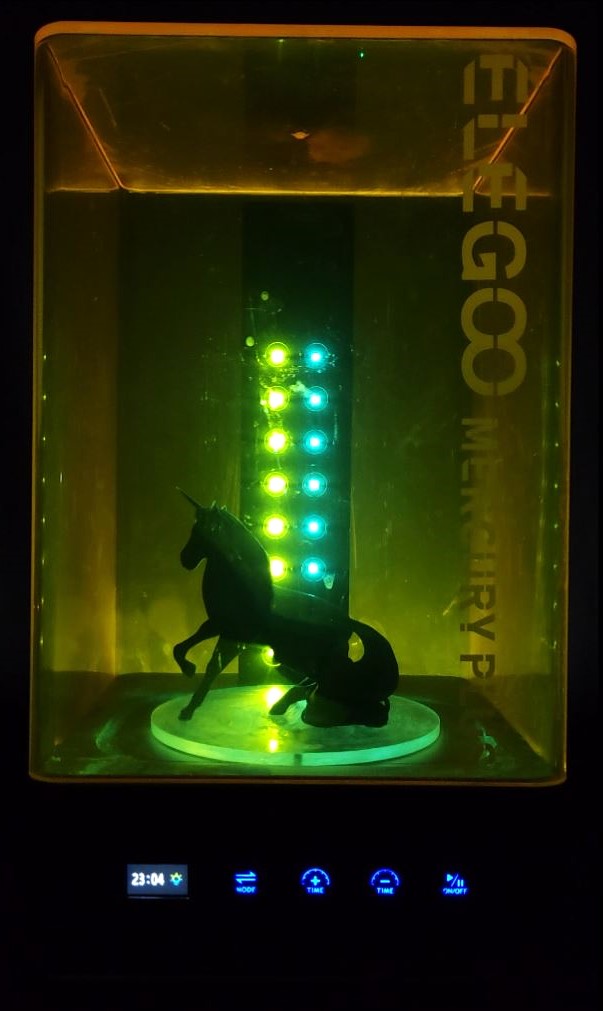
6. Cure
The final step is curing the model with UV light to harden and solidify it. This process also makes the model safe to handle without gloves. I use the ELEGOO Mercury Plus for curing, which has a max cure time of 30 minutes. This seems to work great for my prints. However, I have noticed that when curing clear resin, it can tend to yellow a bit. Just something to keep in mind.
Unicorn printed with supports by Prism Prints
After your model is completely cured, it is safe to handle. There may still be areas from the supports that need cleaning up, but you can begin painting from this point!
Learn about Ben’s entire process from 3D modeling in Shapelab until painting the 3D printed miniature in his video below.
Ben’s guide provides a clear and practical roadmap for transforming digital art into tangible, 3D printed models. His personal insights are invaluable for artists and hobbyists alike who want to explore the exciting intersection of virtual creativity and physical craftsmanship.